Image Map

Wednesday, December 14, 2011

DIY: Doily Snowflake Ornamnets


Here is a super cute and easy DIY to decorate your Christmas tree! I made a few of these little guys last night, and it only took me about 30 minutes.

Here's what you will need:

  I got all these materials at JoAnne's.
  • Small Doilies 
  • Wood circles 
  • Glue (Super glue, or Modge Podge)
  • Ribbon
  • Paint
  • Scissors
  • Optional: Glitter Paint 

1. Paint your wood circles any color you wish. I chose green and red to keep things festive!


2. I chose to add some sparkle to my doilies. I mixed gold and silver glitter paint to paint them.


3. Put some super glue (or modge podge) in the center of your circle, and around the edges.
4. Slap that cute little doily on your circle! Let dry.


5. Take your ribbon and thread it through a hole on the doily. Cut and tie to create your hanger. 


6. Hang and enjoy! Aren't they cute? I love the little bit of color that peaks out. Now that I think about it, these would be nice coasters too!


Monday, December 12, 2011

makeup bag peak


Here is a little peak inside my makeup bag. These are the products I use just about everyday. Yes...many are from Clinique, but no surprise there! 

1. Clinique's Chubby Stick. I use the color "Mega Melon," seriously everyday. They are a tinted chap-stick, so no stickiness of a gloss, and lighter than a lipstick.
2. Clinique's Perfectly Real Powder Foundation. I have always been a liquid foundation girl, but have recently made the switch to a powder. This one gives full coverage, and controls shine.
3. Diorshow mascara. My lovely coworker at the Dior counter gave me a sample of this mascara, and I love it. It gives such thick, full lashes!
4. MAC pigments. These little guys have so many uses, and last for years. The color shown above is "Naked," but I use "Melon."
5. Clinique Touch Base. This eyeshadow primer helps eyeshadow look brighter, and last longer. I use "Canvas," or "Canvas Light," if I want my eyeshadow to appear brighter.
6. Smashbox Brow Tech To Go. So easy to use, and the color looks natural and stays all day. It also has a comb with lightweight gel to keep brows in place.
7. Smashbox Jet Set Waterproof Eye Liner. Seriously awesome. Gives the allusion of a liquid liner, without the fuss. Stays put and lasts forever!
8. Clarins Everlasting Fondation. Has the consistency of a lightweight foundation, with the coverage of a concealer. This is the only thing I have found to cover up my dark circles, and not crease.

Do you have products that you use everyday? I would love to here them! I'm always on the look out for my new favorite product.

Friday, December 9, 2011

Brought a tree home!

  Tommy and I went and got ourselves a little tree today! I am pretty excited because it's our first tree together. It's already making our house smell amazing too! We had planned on chopping it down ourselves, but the pre-cut trees were less expensive.


   There it is! I'm planning on making a few ornaments once the tree is secure in the holder and the lights are up. 

Thursday, December 8, 2011

Let the Holidays Begin!

  Now that fall quarter is over, I am ready to embrace the holidays. I can now focus on decorating a tree, Christmas shopping, baking, and spending more time with the people I love. Today I went and got some materials to make some ornaments, and tomorrow Tommy and I are going to chop down a small tree.

  My backyard must have gotten the holiday memo, because a small amount of some kind of holly looking plant has begun to grow. I am not much of a gardener, even though I would like to be. I am allergic to pollen, grass and other outside things. All those sneezes and eye itching turned me off from working in the yard.

  Because of this, our yard is full of weeds and other mystery plants. It's fun to go outside to find new things growing and decomposing. These bright little berries were a pleasant surprise.


Wednesday, December 7, 2011

Little Seahorse


 Dress: Buffalo Exchange
Blazer: Thrifted
Shoes Me Too (c/o my roommate, Kelsey)
Tights: Target
Necklace: I got the charm in Oregon a few years ago.

   Finals are almost done! Yiiippee! Tomorrow I have my last test at 8:30 am, and then it's officially winter break. I have so many things I want to do while on break, I hope I can fit it all in!

  Speaking of break...Tommy and I have been devouring Breaking Bad on Netflix instant the past few weeks. Anybody watch this show? It was a bad idea to start watching it during finals, it made procrastinating waayyyy too easy. It's like a more hardcore Weeds, except better because you get to watch the dad from Malcolm in the Middle be a total badass.

Monday, December 5, 2011

Dear Santa, I've been good!


 A few things I'm wishing for this Christmas!
1. I am obsessed with these Loeffler Randall rainboots. They have a zipper on the back!
2. I love the equestrian inspired hardware on this Big Buddha cross body.
3. How cute are these jar candles by Pollen Arts?
4. All these NARS nail colors are staples!
5. I could wear these Marc Jacobs earrings with everything.
6. This Fujifilm Instax MINI would be so fun!

Thursday, December 1, 2011

Another excuse to drink coffee

   I love me some coffee. Does not mater if it's a latte or drip, hot or cold, soy or 1%. If it has coffee in it, I will probably drink it and ask for more. What makes coffee better? Drinking it out of a cute mug of course. Things just taste better when they come in a good lookin' package. It's science. Here are some of my favorite handmade mugs from Etsy!

Ship mug from Pieces by Joanna.

 Chickadee mug by Kristen k. Swanson.

Textured stem mugs by Kim Westad.

 Rabbit mugs by Tania Julian Ceramics.

 Turquoise mugs by Reviving Design.

 Whale in a bell jar mug by Mud Stuffing.

Birch tree mug by Josies Pot Shop.

Umbrella mug and tray by Zuppa Atelier.

   I'm thinking about putting one of them on my Christmas wish list. Do you have a favorite? I am leaning towards the tree mug, or the ship mug.

  While perusing Etsy's mugs, I found several handmade mugs with Starbucks written on them. Does anybody else find this as hilarious and ironic as I do? I mean...what's the point of making something that you could go and buy at a coffee chain? That's the power of a branding I suppose.

Wednesday, November 30, 2011

Presentation Day

   Today my group and I are presenting our experiment to the rest of the class. This class is the last in the statistical sequence for psychology, and I can't wait to be done! Math has never been my favorite subject, and I thought by majoring in psychology I wouldn't have to revisit it. Very, very wrong. But it's almost over! Hallelujah.

    While on the topic of things I dislike, presenting is something that gives me some serious anxiety. I start worrying about public speaking days in advance. Once I get in front of people, usually I calm down and get through it just fine. It's the few hours before that especially stress me out!

    For an extra boost of confidence, I like to dress up just a little. My logic is when you feel more confident, you're able to speak with more authority. Also, if you goof up, maybe they won't notice because they are too busy admiring your outfit. Maybe. I have a feeling my professor couldn't give a shit about my attire. But if it makes you feel better, why not right?


Blouse: Cable and Gauge (Macy's)
Skirt: Pilcro and the Letterpress (Anthropologie)
Tights: Target
Shoes: Naturalizer 
Earrings: Forever 21

Monday, November 28, 2011

A little about hair dye

   I used to be very, very blonde. It was a large part of who I was; "the girl with the super blonde hair." I'm not exactly sure what prompted my desire to go dark during my freshman year at Western. I think I wanted to move away from blonde stereotypes, and be taken a little more seriously. Also, starting college gives you a chance to rebuild your identity, and I didn't want to be "the blonde girl" anymore.


    So, just like that I went dark. It was a huuuuuge change, and for the most part I liked it. But after being so blonde, having dark hair felt...kind of dull. I needed some oomph. This is when I started to experiment with red, which I loved so much more. Sometimes I still miss my blonde hair, but the red feels more like me. Interesting how simply changing your hair color can make you feel like a whole new person!

   I get asked a lot about my hair color. Most people where I get it done at, to which I reply, "in my bathroom!" I simply don't have the money to get it done at a salon. Also, my mom used to be a hairdresser so she taught me how to do it myself. Back when I was blonde we would foil each other's hair, which would take forever. That's another thing I like about dark hair; simply squirting a bottle of hair dye on your head is so much easier than messing with bleach!

   Because I get asked about how I color my hair so often, I thought I would do a post about it. Now, I am no expert when it comes to coloring your hair. I have done it a lot, and sometimes it turns out better than others. But here is a very simplified explanation on how to mix your own color. Say goodbye to your box of color! Mixing it yourself is so easy, fun and more cost effective.


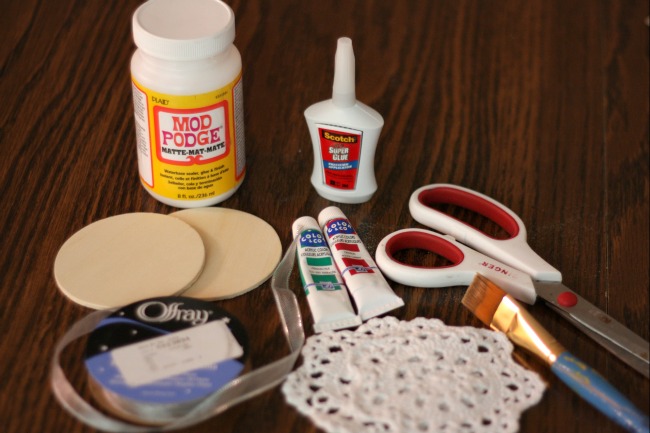
   First, the tools. You need a bottle (I like one that holds at least 8 oz.), plastic gloves, and an after color treatment/conditioner. I really like to use the Ion Color Sealer (shown above) right after my color.

  To mix color, you need the actual color and a developer. Developer comes in different levels; Level 10, 20, 30 and 40. Developer is what initiates the coloring process. Higher levels of developer means it has more strength. The stronger it is, the lighter it will make your hair.  Hair color comes in different levels as well that range from 1 (black) to 10 (blonde). Simply put, the larger the level, the lighter the hair color. If you are dying your hair dark, stick with 10, 20 and maybe 30 if you want more lift. 40 should really only be used if you are bleaching your hair. This is a very simple explanation; for a better one, go here.


   I like to mix 2 ounces of a red color with one ounce of a brown. I have found a bit of brown helps to neutralize the red a bit. Pay attention to the base colors. The red I used above had a pure red base, while the brown had blue and red. I usually choose different colors every time, so every time I dye it, it comes out a little differently. But I have found that adding a bit of blue will give it more of a purple-y hue, while adding orange, or red while keep it warmer. No big surprise here. This site has a better explanation of color bases.


   Then  add your developer! My dye called for even parts, so I put in 3 ounces. I used two ounces of 30, and one ounce of 20. Usually I only use 20, but I have been experimenting with 30. After this time, I will probably stick with 20 because it's less damaging.
   I have yet to run into a color that didn't need equal parts developer, but check the back of your hair dye bottle to be sure. Shake it up, and start applying to your head! Make sure you have combed through your hair to get the tangles out.


   I first apply the color to my roots, and let it sit for about 5-10 minutes. Because my roots are lighter than the ends, I like the color to sit a little longer there. This helps to create a more even color. Then in sections starting in the back, apply the rest of your color. I like to then make a bun on my head and let it process for about another 20 minutes. When you're done applying, be sure to wash your hands, and wipe off the dye on your face and neck.

  Wash your hair, and let the conditioner/treatment sit extra long. Your hair will thank you. Now go to Sally's and buy yourself some color and developer! Say no to the box. You will get more predictable results when you mix it yourself. Like I said, every time I dye my hair, it turns out a little bit differently. But that is part of the fun!