Image Map

Monday, September 30, 2013

Comfort Food Monday: Simple Apple Slice


What does the term comfort food mean to you? For me, it's food that makes me feel warm and cozy. Comfort food often reminds me of family, home, love and a sense of well-being. Comfort food is also dang tasty. Deliciousness paired with feelings of snugness? Clearly comfort foods are the best, which is why I'm excited to announce a new weekly series, "Comfort Food Mondays." We all need a little love on Mondays, right? 

The first recipe in this big, warm, fuzzleball of a series is a dessert will always remind me of home. It comes from my grandma's collection of family recipes, and my mom made it all the time when I still lived at home. It's really simple, really delicious and perfect for a chilly fall day. I definitely recommend serving it with a scoop of ice cream, whipping cream, or even some vanilla yogurt on top. 


Apple slice is basically a no-fuss apple pie. First we make a crust that consists of flour, shortening, a pinch of salt and sugar, an egg yolk and milk. Combine these ingredients, stir until it just comes together, the roll out half right on a cookie sheet. Top with apple slices, cover with cinnamon and sugar, cover with the rest of your dough and pop it in the oven. There is a reason my mom made this so often...it's simple! 


What are some of your favorite comfort foods? I'm excited to start this series with you guys! Ice cream Sundays were great, but one can only eat so much ice cream before you want something warm, filling, and filled with love. 


Simple Apple Slice:
2 1/2 cup sifted flour
1 tbs. sugar
1 tsp. salt
1 cup shortening
1 egg yolk
approx. 2/3 cup milk
5 cups sliced and peeled Granny Smith apples (about 3-4 apples, depending on size)
1 cup sugar
1/3 cups packed brown sugar
1 tsp. cinnamon

Glaze:
lemon juice, approx. 1/2 lemon
several tbs. powdered sugar
*Don't overthink this glaze! Add a few tbs. powdered sugar, add some lemon juice, combine and add more juice or sugar to reach desired consistency. Should pour easily.

1. Preheat oven to 400 degrees. In a large bowl, sift flour then stir in sugar and salt. Add shortening to flour mixture, and use your hands to combine flour and shortening until the shortening is in small balls.
2. Place egg yolk in a measuring cup and add milk to make 2/3 of a cup. Lightly whisk together, and add to flour/shortening mixture. Use your hands to combine, mixing just enough so dough shapes into a ball.
3. Split the dough into halves. Roll out on half of the dough onto cookie sheet, using flour to keep dough from sticking to the rolling pin. Dough should roll out to be about 12 x 12.
4. Spread apple slices over dough, leaving a small amount of dough around the edges. Mix together sugar, brown sugar and cinnamon, then pour evenly over apple slices.
5. Roll out remaining dough and cover apple slices. Use your fingers to seal bottom and top layers of dough together. Puncture top of your dough with a knife, and place in oven for 30-40 minutes. Apple slice should be golden brown, and you will probably have syrup seeping out the edges.
6. Remove from oven, and while still hot, drizzle with glaze. Let cool, then cut into slices and enjoy!

Tuesday, September 24, 2013

Pumpkin Spice Caramel Corn with Pecans


When autumn hits, I try to squeeze pumpkin pie spice into everything possible. I sprinkle it into my coffee, love it on toast and of course put it in just about every baked good. It's just so comforting and delicious! So when I decided to whip up some caramel corn, of course pumpkin spice had to be included.


Popcorn is just plain addicting. Add a crunchy, caramel outside with pecans? Now it's crack corn. Just try to only have one bite, I dare you! As I type this, my crack corn is sitting on the kitchen table, basically screaming my name. I'm simply not strong enough to say no. I definitely plan on bringing it to work tomorrow, because I could probably eat the whole batch myself. Not good...but oh so good.


Pumpkin Spice Caramel Corn with Pecans (Recipe adapted from Joy the Baker)
Approx. 14 cups plain popped popcorn (I used two packages of microwave popcorn)
2 cups whole pecans, roughly chopped
1/2 cup butter (1 stick)
1 cup packed dark brown sugar
1/2 cup light corn syrup
1/2 tsp salt
1/2 tsp baking soda
1/4 tsp pumpkin pie spice, plus a little extra to dust on top

1. Preheat oven to 250 degrees. Lightly grease two cookie sheets. Place popcorn and pecans onto sheets evenly.
2. In a 2 quart saucepan, add brown sugar, butter, corn syrup and salt. Whisk over medium heat until it starts to boil. Let boil for about 5 minutes without stirring.
3. Remove caramel from heat  and whisk in baking soda and pumpkin spice. Your mixture will froth a bit, just keep stirring!
4. Quickly pour caramel over popcorn and pecans, using large spoons to get popcorn/pecan mixture evenly coated with your caramel. Once both cookie sheets have been coated, sprinkle with more pumpkin pie spice and place into oven for 20 minutes.
5. After 20 minutes, remove rom oven and toss popcorn using a large spoon. Sprinkle with a little more pumpkin pie spice. Place back into the oven for another 20 minutes.
6. Remove caramel corn from the oven, and let cool for several minutes before handling.

Monday, September 23, 2013

I Dream of Sweden

In 1930 my great grandmother, Astrid, traveled from Sweden to live with her aunt and uncle in Yakima, Washington. She was only 23 at the time and didn't know any of her family living in America, so it was a huge decision. With help from her family and women of the YWCA, Astrid made her way across the country to Washington state. A year later she married a well established farmer in the area, Emil Lovestrand, and they had eight children together including my grandmother.
source
I have always found her story to be pretty amazing. I can't imagine sailing to a new country to live with relatives I didn't know, and then having to travel across the states without being able to speak English. I'm so thankful for her bravery! 

Being the proud Swede that I am, I have always been inspired by Swedish culture. It's definitely a place I hope to explore one day. Food and design are two of my favorite things, and Sweden does them both very well! How could I not be proud? Here are a few things I love that come from Sweden :)


Pepparkakor cookies // Swedish meatballs

top right // top left // bottom


A few Swedish blogs/sites:


Yay Sweden! Oh, and I had to throw in this crazy picture of my with this huge dala horse in North Dakota. 

Friday, September 20, 2013

Coffee Chocolate Chip Pancakes


Breakfast just isn't complete without coffee. I've tried drinking tea instead, and while I'm sure my body was thankful, my soul wasn't in it. I simply need my sweet, sweet cup of jo. So I thought, why not celebrate coffee in all its glory during breakfast? So that's what I did. I tucked instant coffee inside a bed of fluffy pancake, and let it cuddle up to some chocolate chips, butter and maple syrup.  Then I ate it.


I had every intention of making these pancakes from scratch, but somehow my baking powder disappeared in my recent move. I searched high and low with no luck. Normally I would have gone to the store, but since I had just gotten back from the store, these pancakes turned into easy pancakes. If you want to use a recipe, go for it! But if you're having a lazy morning, just fully commit and use a mix. No judgement here.

If you choose to use a mix, scale the coffee, kahlua and chocolate chips accordingly to the amount of mix used. If you use your own recipe scale the proportions to the amount of flour used. Keep in mind there is no real way to screw this up...it's pancakes with chocolate and coffee. It's gonna be good.

Coffee & Chocolate Chip Pancakes
2 cups pancake mix
1 1/3 cup cold water
1/2 cup chocolate chips
1 tbs. kahlua
1 1/2 tbs. instant coffee granules

1. Mix together pancake mix and coffee granules together with a whisk to get rid of clumps. Add water, kahlua and chocolate chips. Stir to fully incorporate.
2. Cook on a buttered pan over medium heat. Turn pancakes when holes appear on pancake. Top with a bit of butter and syrup. Enjoy!

Monday, September 16, 2013

Blogging: The Great, Good, Bad and Ugly

It's crazy to think I've been blogging for a little over two years now. What started as motivation to learn how to use my new camera, has evolved into so much more. While I love blogging for many reasons, I will admit that constant exposure to the "blogging world" may have some negative effects.

I have wanted to write a post discussing these things for awhile, but have put it off because I don't want to seem like I was bashing blogging. The good definitely outweighs the bad, otherwise I wouldn't be blogging! I love it, but of course it's not all sunshine and rainbows.


The Great // My favorite thing about blogging is the supportive community of awesome, creative people. It can be really scary putting yourself out there, but I'm convinced bloggers are some of the nicest people out there. Since day one, fellow bloggers have always ben supportive, positive and friendly. This blog started as a style blog, and I was super nervous about putting outfit pictures online...it just felt so strange. But the supportive feedback was amazing! We bloggers are in this together, and I love that sense of community.

The Good // This blog has taught me so many things! It has motivated me to learn more about photography, try new recipes, make more diy projects and try new styles. I love that blogging inspires me to be more creative and pushes me to create more consistently. There is so much to be inspired by in the blogging community, and being apart of that is a lot of fun. If I hadn't started this blog, I would have never discovered my love for photography.

The Bad // The blogging world moves quickly. A lot of blogs post every single day, and it can be really overwhelming to create quality content at that rate. Trying to juggle work, relationships and blogging can be really difficult, and when I can't keep up I feel guilty. I often have to remind myself this blog is a hobby and if I can't post as regularly as I'd like, there is no reason to feel bad about it. It's supposed to be fun!

The Ugly // Sometimes blogs are inspiring because they depict a fantasy, an unrealistic representation of life. You probably know what I mean by this. Simply scroll through Pinterest and you see pages of beautifully decorated rooms with no clutter, perfectly styled hair, food that sits upon the prettiest plates and expensive outfits outside Fashion Week.
This isn't everyday life, which in fairness is kind of the point. We read blogs because we like pretty things! These images inspire us, but it's not always attainable which can be discouraging. Let's be real, our homes get cluttered, our hair is not thick enough to braid it like that, and the outfit outside Fashion Week is awesome but unpractical. The constant exposure to unrealistic beauty in all areas of life can lead to feeling inadequate and wanting more material things.

Whether you just read blogs or write one, what are your thoughts on blogging? What do you love about it, or maybe hate? If you write a blog, how has it changed you? 

Saturday, September 14, 2013

Roasted Carrot Hummus


I love making hummus. It's so easy, and having something to dip veggies in definitely motivates me to eat them. I saw roasted carrot hummus on a menu a while back and the idea randomly popped back into my head a few days ago. I love how it turned out! Definitely tastes like hummus, but the carrots add just a little sweetness.

With football season upon us, this makes for a great football party dish that you don't have to feel guilty about. I'm not a huge football fan, but any reason to get together with friends to eat and drink together is fine by me! Plus, the Seahawks look like they might be pretty good this year and I'm a total fair-weather fan (no shame).

What do you like bringing to football parties? I'm attending one tomorrow and would love some more ideas!


Roasted Carrot Hummus
8 oz. carrots, roasted
15 oz. canned chickpeas or garbanzo beans
approx. 1/4 cup liquid from the can of chickpeas
1 1/2 tbs. tahini
2 tbs. olive oil
2 small garlic cloves, roughly chopped
Juice from half of lemon
1/2 tsp salt
fresh ground pepper

1. First, roast your carrots. You can use whole baby carrots  or chopped large carrots. Place on a cookie sheet and lightly cover with olive oil. Season with just a bit of salt, plenty of fresh ground pepper and a bit of rosemary (optional). Cook at 400 degrees for about 45 minutes, or until soft to the touch.
2. In a blender or food processor add carrots, chickpeas, tahini, olive oil, garlic, lemon juice and water from the can of chickpeas. Blend until smooth, adding a little bit more liquid if needed. Add salt and pepper. Top with a bit of olive oil, and enjoy!


Thursday, September 12, 2013

Balsamic Blueberry Grilled Cheese Sandwich

Hey guys! Sorry about the lack of activity around here, this whole moving thing sucked all my time and energy that usually went towards this blog. But I've had a day to rest so I'm starting to feel back on track! Anyway, on to grilled cheese.


If you've read this blog for a little while, you're probably familiar with my love for blueberries. If not, I'll catch you up really fast: I love blueberries...a lot. Last year Tommy and I went blueberry picking and stuffed out freezer full and enjoyed blueberries all year. Somehow I missed blueberry picking season this year, which really bums me out. They are so dang expensive! So while there are still fresh berries at the store, I'm gonna eat em' like crazy. 

Oh, another thing I love! Cheese. And bread. So I thought, why not combine all three of these things into one little love package? Well my friends, that's what I did and it was pretty dang delicious. 


At this point you might be saying to yourself, "balsamic and blueberries? That's weird." The balsamic vinegar adds a nice tartness to the berries while making the flavor a little more complex. It's a subtle flavor, so don't worry. It's super tasty! If you wanted to get super crazy with it, a slice or two of bacon would be pretty yummy too...just sayin'. If it weirds you out too much, of course you don't have to add it. you'll just end up with a much sweeter grilled cheese. 

Oh, and make sure you use enough cheese! This is not a time to start thinking about calories. You need enough cheese to balance the sweetness of the berries. You don't want them overpowering the sandwich. 

Balsamic Blueberry Grilled Cheese Sandwich
2 slices of bread (I used sourdough)
Plenty of white cheese (I used Havarti, but lots of different  cheeses would be good! Mozzarella, Monterey, Swiss, or Sharp White Cheddar would be yummy. I have been meaning to try goat cheese!)
Fresh spinach or arugala 
1/2 cups fresh or frozen blueberries
1 tbs balsamic vinegar
1 1/2 tbs. brown sugar


1. In a small saucepan, combine blueberries, sugar and vinegar. Turn on medium heat and let come to a slow boil. Use a utensil to crush berries as you stir. After boiling for about 5 minutes, pour mixture into a mesh strainer and let the juice syrup separate from the solid berries. Save the syrup for cocktails, pancakes or both!


2. Spread blueberries onto a piece of bread, top with cheese, some spinach, then more cheese! Sprinkle with fresh ground pepper. Top with your other slice of bread and toast. Enjoy!

Friday, September 6, 2013

Cardstore.com Review

When Card Store contacted me asking if I'd like to try out their service, I was excited because I have a lot of birthdays to celebrate this time of year! I knew it would be the perfect opportunity to make a personalized card for Tommy's birthday. I decided to make a card featuring lots of photos of us over the years; I thought it would be nice to frame it after I gave it to him since we don't have a lot of photos of us together at the house.


Card Store allows you to create a wide range of cards for every occasion. You can choose from cards with templates and graphics, or you can opt for photo cards in which you upload your own photos. Of course I went with a photo card! You can further customize your card with text and a wide array of fonts, and you have the option of adding more photos to the inside and back.


Overall, I was really impressed with how my card turned out! The paper is sturdy and my photos printed nicely with no large pixels. They also sent two envelopes along with the card which was handy. The card shipped quickly, and arrived just a few days after I ordered it. I will definitely be making more cards in the future!


Do you make your own cards, or buy them at the store? I'm really fond of making my own, especially for Valentines day. This website will definitely be an easy alternative in the future.

Disclosure: I was not financially compensated for this post. I received a sample for review purposes. The opinions expressed are completely my own and based on my experience.

Thursday, September 5, 2013

August in Review

Yay, fall is here! August was fun, but I won't lie, I'm really excited it's September. I had my first pumpkin spice latte today, chicken soup is on the stove and it's been raining the past few days. I think fall is my favorite because it's so comforting.

That being said, I will miss the long summer days. Here are a few highlights from August.

Made some awesome thai red curry pizza. So much yum. 

Enjoyed a wine picnic on the bay. Gotta do this more often. 

Met my friend Megan's dog, Hoagie!

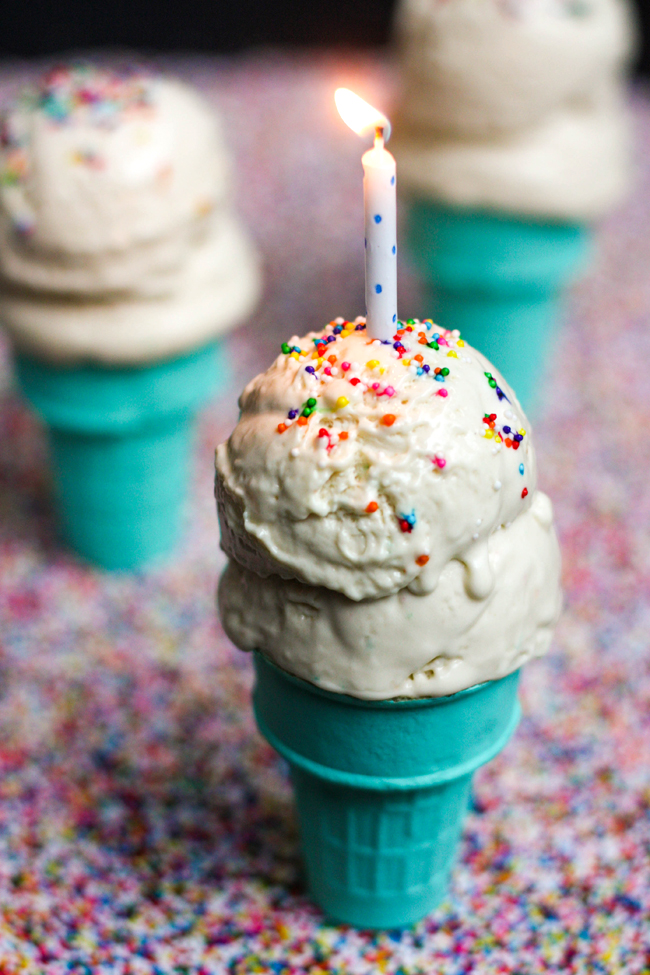
Celebrated lots of birthdays, so of course I had to make some cake batter ice cream

Wore black and white patterns with green...one of my favorite color combos. 

Listening:  I have been revisiting Neko Case a lot lately. She has such a lovely voice.
Watching: Breaking Bad of course! We also blew through Orange is the New Black on Netflix in about a week. I can't wait for the next season! Have you read the book? I'm thinking about giving it a try. 
Reading: Uhh...not much really. I was lame in terms of reading this month. Gotta get a new book!


Instagram // 1. Walking around downtown. // 2. On the ferry, looking over the edge. // 3. Stormy clouds and a Bettie Page mural on the side of a house. // 4. Dripping blackberry ice cream! // 5.  Lotsa clocks. // 6. Kale and eggs, one of my favorite breakfasts.

A Few Favorite Posts:

Tuesday, September 3, 2013

a little update: moving, bumbershoot & exhaustion

The past few days have been a whirlwind. On Sunday Tommy and I went to the Bumbershoot music festival in Seattle (about a 2 hour drive) came home the same night, woke up and moved all day, then this morning I woke up and cleaned our old house for 4 hours. I'm whooped. It was crazy...I'm not sure what we were thinking! Haha.

There are definitely aspects of moving that are fun, like decorating a new space. But moving forces you to take apart your entire life and then put it back together again. While I have moved quite a bit the past several years, I've never experienced a whirlwind move in one day. I wouldn't really recommend it.

Despite the craziness, we made it into our new place in one piece. I can't wait to really start unpacking and organizing our new home. It's my favorite part of the whole process, and once I recover from the past two days I'm gonna arrange the hell out of this apartment. Look out.

Bumbershoot was fun, but it might be my last visit.  Bumbershoot is such an awesome idea (music, art, comedy, lots of food and merchants), but the lines were so long, and the crowds really started to wear on me. It kinda made me feel old actually, hah. Here are a few shots including David Bazan and Death Cab.

Sunday, September 1, 2013

Ice Cream Sunday: Pumpkin Ice Cream

Well, we have made it to the end of this little ice cream series. It's a little crazy to think it's already been twelve weeks! That was a lot of ice cream.


To say goodbye to summer and transition to fall, I made pumpkin ice cream. I love pumpkin everything, and pumpkin ice cream is no exception. It's a bit like eating frozen pumpkin pie! Yum. Can't wait for pumpkin pie...with a scoop of this ice cream on top. And some whipped cream. Yeah, I went there. 

Today Tommy and I are going tot the Bumbershoot music festival in Seattle. It's kind of crazy timing because we spent all day yesterday packing up our entire house, and today is our actual moving day. But instead of moving we are playing in Seattle and celebrating Tommy's birthday! Yay! Happy birthday my love! Moving will just have to wait until tomorrow. 


Pumpkin Ice Cream
1 15oz. can pumpkin puree
2/3 cup sweetened condensed milk
4 egg yolks
1 cup heavy cream
1 cup milk
1 tbs. vanilla extract
2 tsp. pumpkin pie spice

1. In a small saucepan, combine milk, cream and 1/3 cup sweetened condensed milk and turn on medium heat.
2. In a stand mixer, whisk egg yolks and 1/3 cup sweetened condensed milk until eggs have lightened in color. Once cream mixture has reached a gentle simmer (don't let boil!), let cool for a few minutes then slowly stir cream into egg mixture. Transfer back into saucepan and continue to cook until mixture thickens and is able to coat the back of a spoon.
3. Strain mixture through a fine mesh strainer. Add pumpkin puree, pumpkin pie spice and vanilla and place in fridge for several hours or overnight.
4. Once cooled thoroughly, place into ice cream maker until the texture of soft serve. Transfer ice cream into an airtight container and let freeze for several hours or overnight. Enjoy!